 Agent Development Kit
TL;DR
In this article, we'll quickly set up and explore the Google Agent Development Kit (ADK) with a basic agent application. By the end, you'll have built a simple agent that can search the web using a single tool.
Why ADK?
Google's Agent Development Kit (ADK) provides a framework for building intelligent systems by leveraging Large Language Models (LLMs) like Gemini as their "brain". These ADK agents can use various "tools" to interact with the real world, such as searching the web or accessing databases, and even form "multi-agent systems" where specialized agents communicate via the Agent-to-Agent (A2A) protocol to collaborate on complex tasks. At its core, an AI agent is an intelligent program or system that perceives its surroundings using "sensors", processes that information, and then acts upon its environment through "effectors" to achieve specific goals autonomously. Essentially, it's a self-operating smart helper that observes, thinks, and performs tasks on its own.
In ADK, "tools" are like specialized gadgets an AI agent can use to interact with the real world. While the agent's "brain" (LLM) does the thinking, tools allow it to perform specific actions, such as searching the internet, looking up information in a database, or even controlling other systems. They essentially extend the agent's abilities beyond just conversation, letting it gather up-to-date information and accomplish practical tasks.
There are three main types of tools in the ADK:
- Function Tools: Tools created by you, tailored to your specific application's needs. Like python functions.
- Built-in Tools: Ready-to-use tools provided by the framework for common tasks. We will use Google search as an example in the practical example.
- Third-Party Tools: Integrate tools seamlessly from popular external libraries. Examples: LangChain Tools, CrewAI Tools.
For now I believe it is enough to understand the basic concepts of the ADK. If you want to learn more about the ADK, I recommend checking out the official documentation.
Creating Google Search Agent
Let's create a simple agent that can search the web using the Google Search tool.
In this example I will be using Python.
Prerequisites
- Python 3.9+
Installation
Create & activate virtual environment
# Create a virtual environment
python -m venv .venv

# Activate the virtual environment
source .venv/bin/activate
Install ADK
pip install google-adk
Create Agent Project
Folder structure for the agent project
project_root/
├── search_agent/
│   ├── __init__.py
│   ├── agent.py
│   └── .env
The __init__.py file is used to mark the directory as a package. It should contain the following code:
from . import agent
Create Environment File
Create a .env file in the search_agent directory. This file will contain the environment variables for the agent. Remember, never share this file publicly, especially if you're using version control like GitHub!
Set Gemini API Key
# Edit the search_agent/.env file with your Google ADK credentials
# Add your API key
GOOGLE_API_KEY=your_api_key
To create a Gemini API key, go to the Google AI Studio Api Keys section and create a new one.
Create Search Agent
Now when we have our project set up, let's create the agent.py file. This file will contain the agent's logic.
from google.adk.agents import Agent
from google.adk.tools import google_search

instruction_prompt = "You are a helpful assistant that can answer questions."
response_format = "You should respond in a friendly and helpful manner. Do not summarize the results."

root_agent = Agent(
    name="search_assistant_agent",
    model="gemini-2.5-flash",
    description="Agent to search the web for a wide range of information.",
    instruction=instruction_prompt + response_format,
    tools=[ google_search ] # List of tools the agent can use. Here we use the Google Search tool.
)
I want to highlight a few important things in the code above:
model: You can find the list of available models in the ADK Models documentation.
tools: This is a list of tools the agent can use. In this case, we're using the Google Search tool, but you can add any number of tools you want.
instruction: This is the instruction prompt for the agent. It guides the agent's behavior and response style. Here's where you can use all your prompt engineering skills to create a good instruction for your agent.
Run the Agent
To run your agent, simply use the following command in the terminal:
adk web
You should see output similar to this, indicating the ADK web server has started:
+-----------------------------------------------------------------------------+
| ADK Web Server started                                                      |
|                                                                             |
| For local testing, access at http://localhost:8000.                         |
+-----------------------------------------------------------------------------+
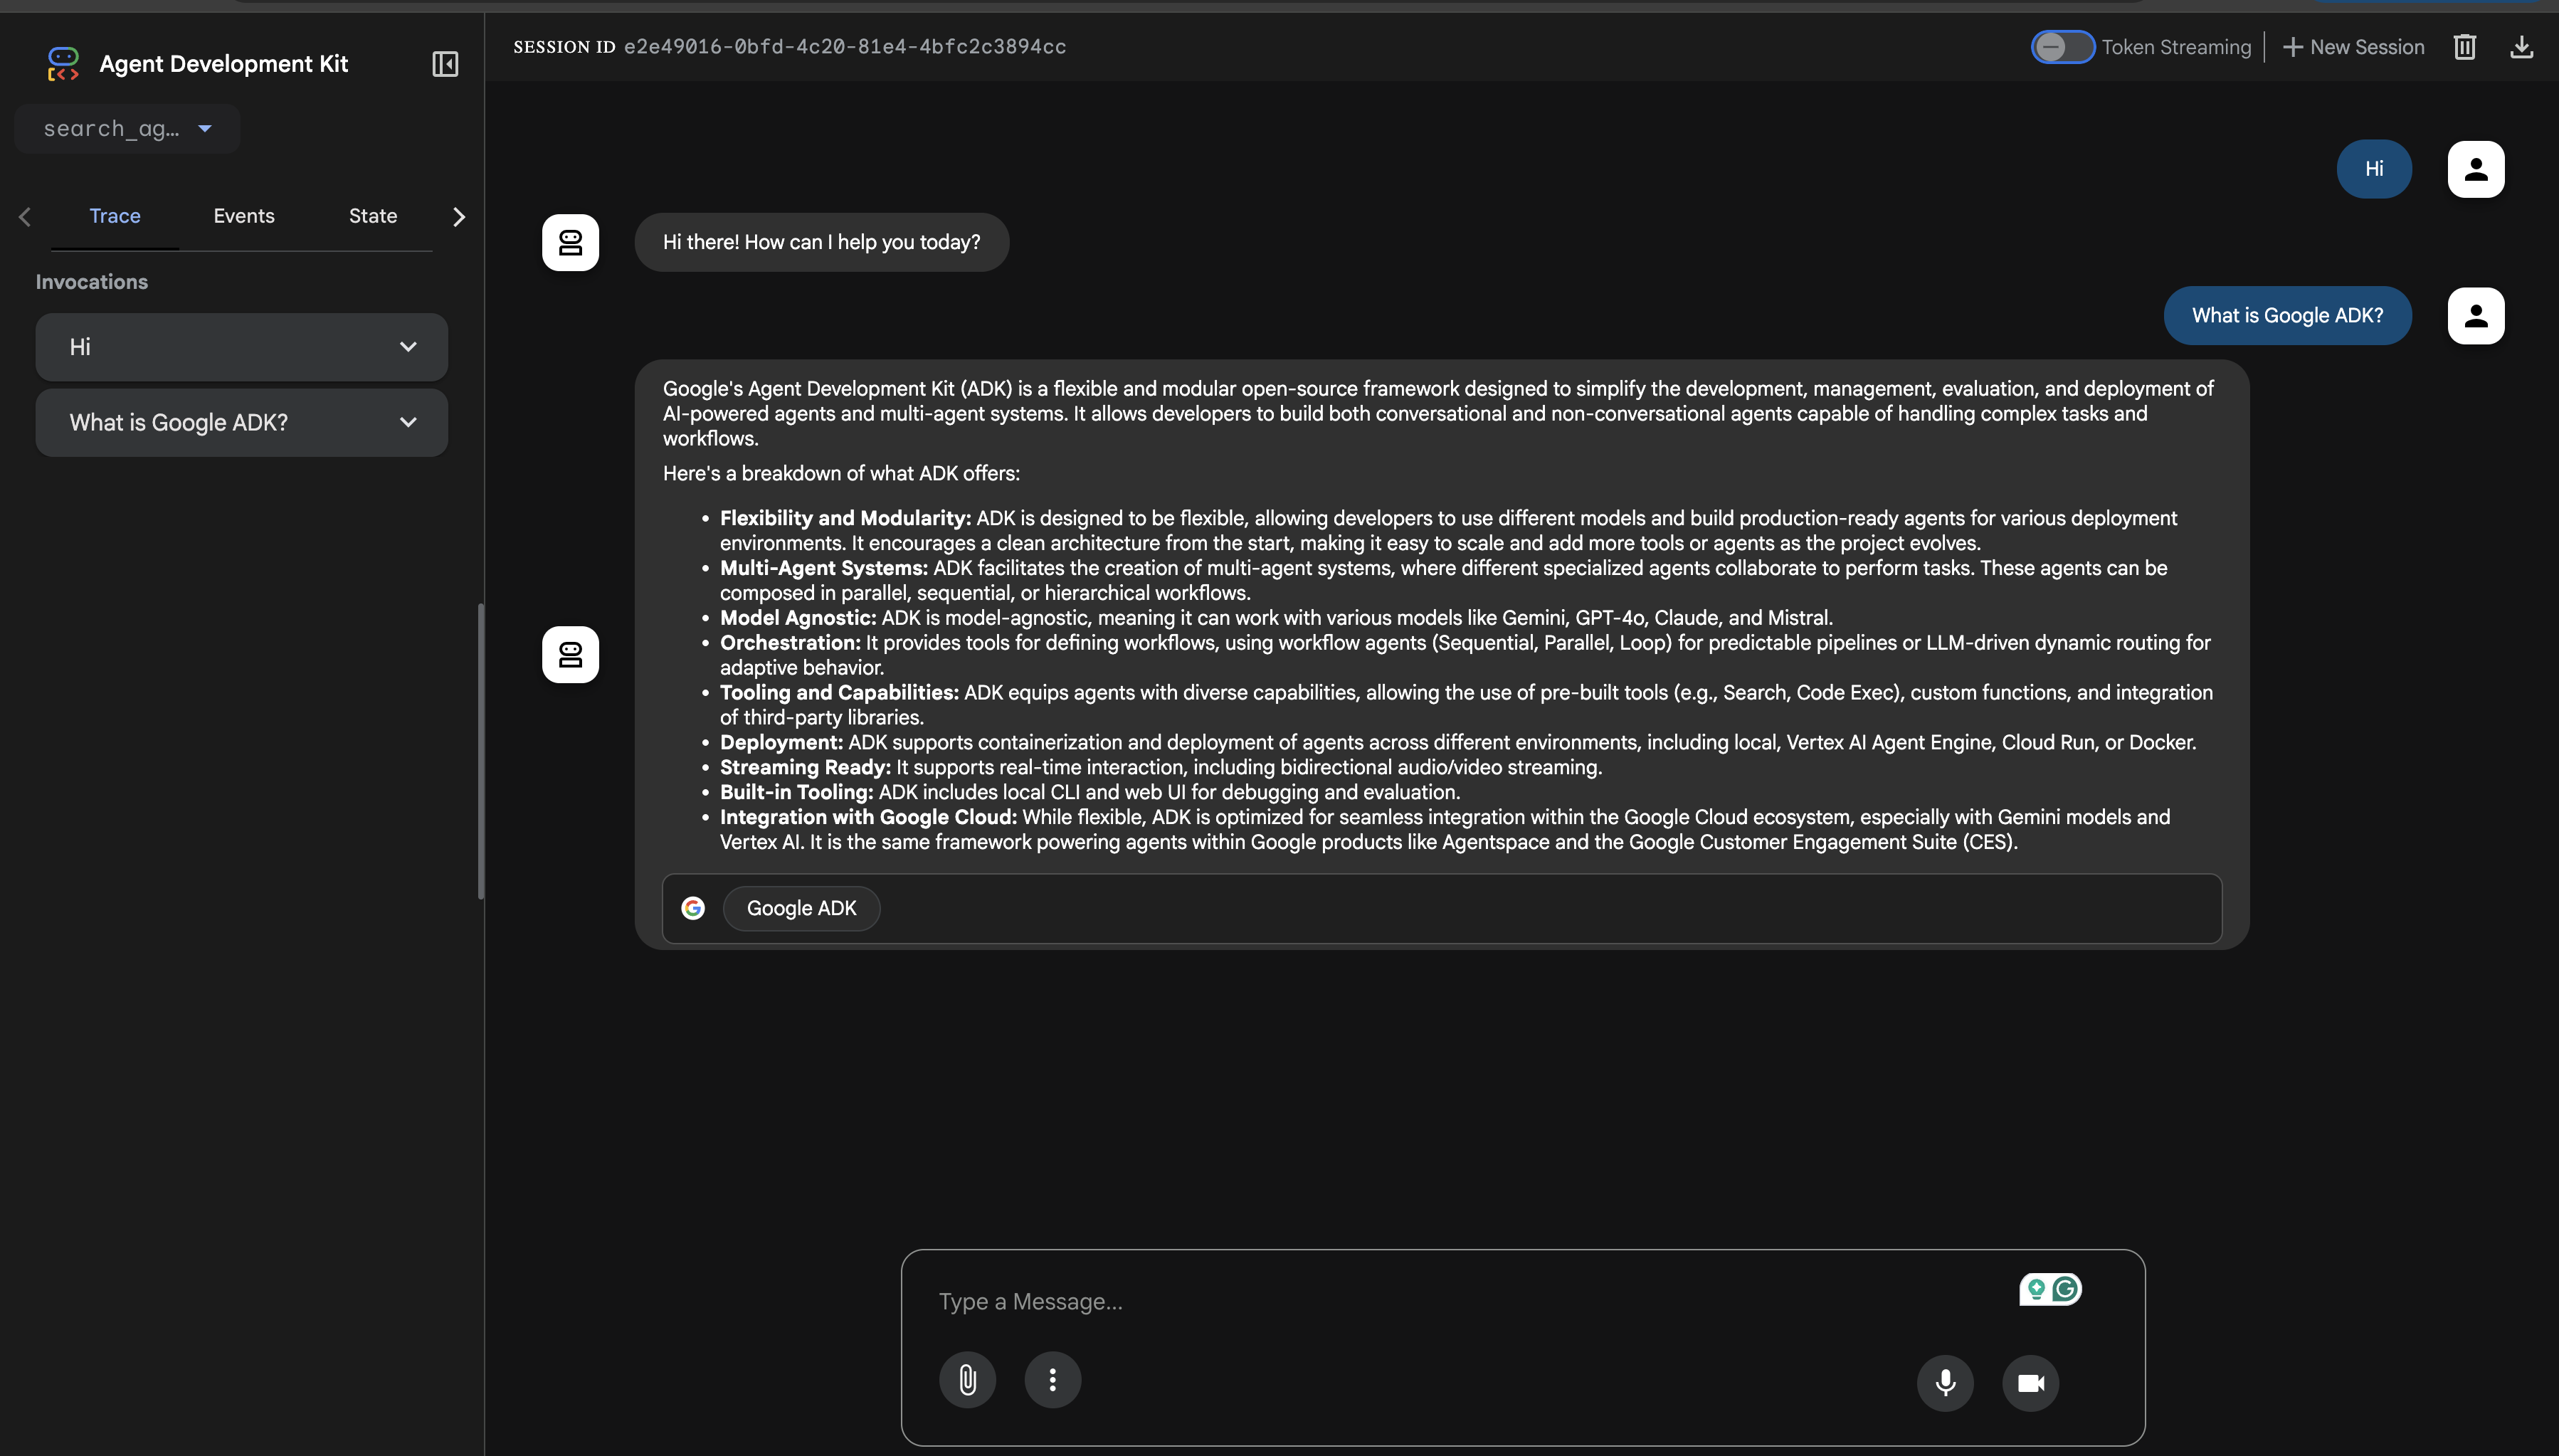
If you open the link in your browser, you can chat with your agent using the textbox:
To examine individual function calls, responses, and model responses, navigate to the Events tab on the left and click on any action:
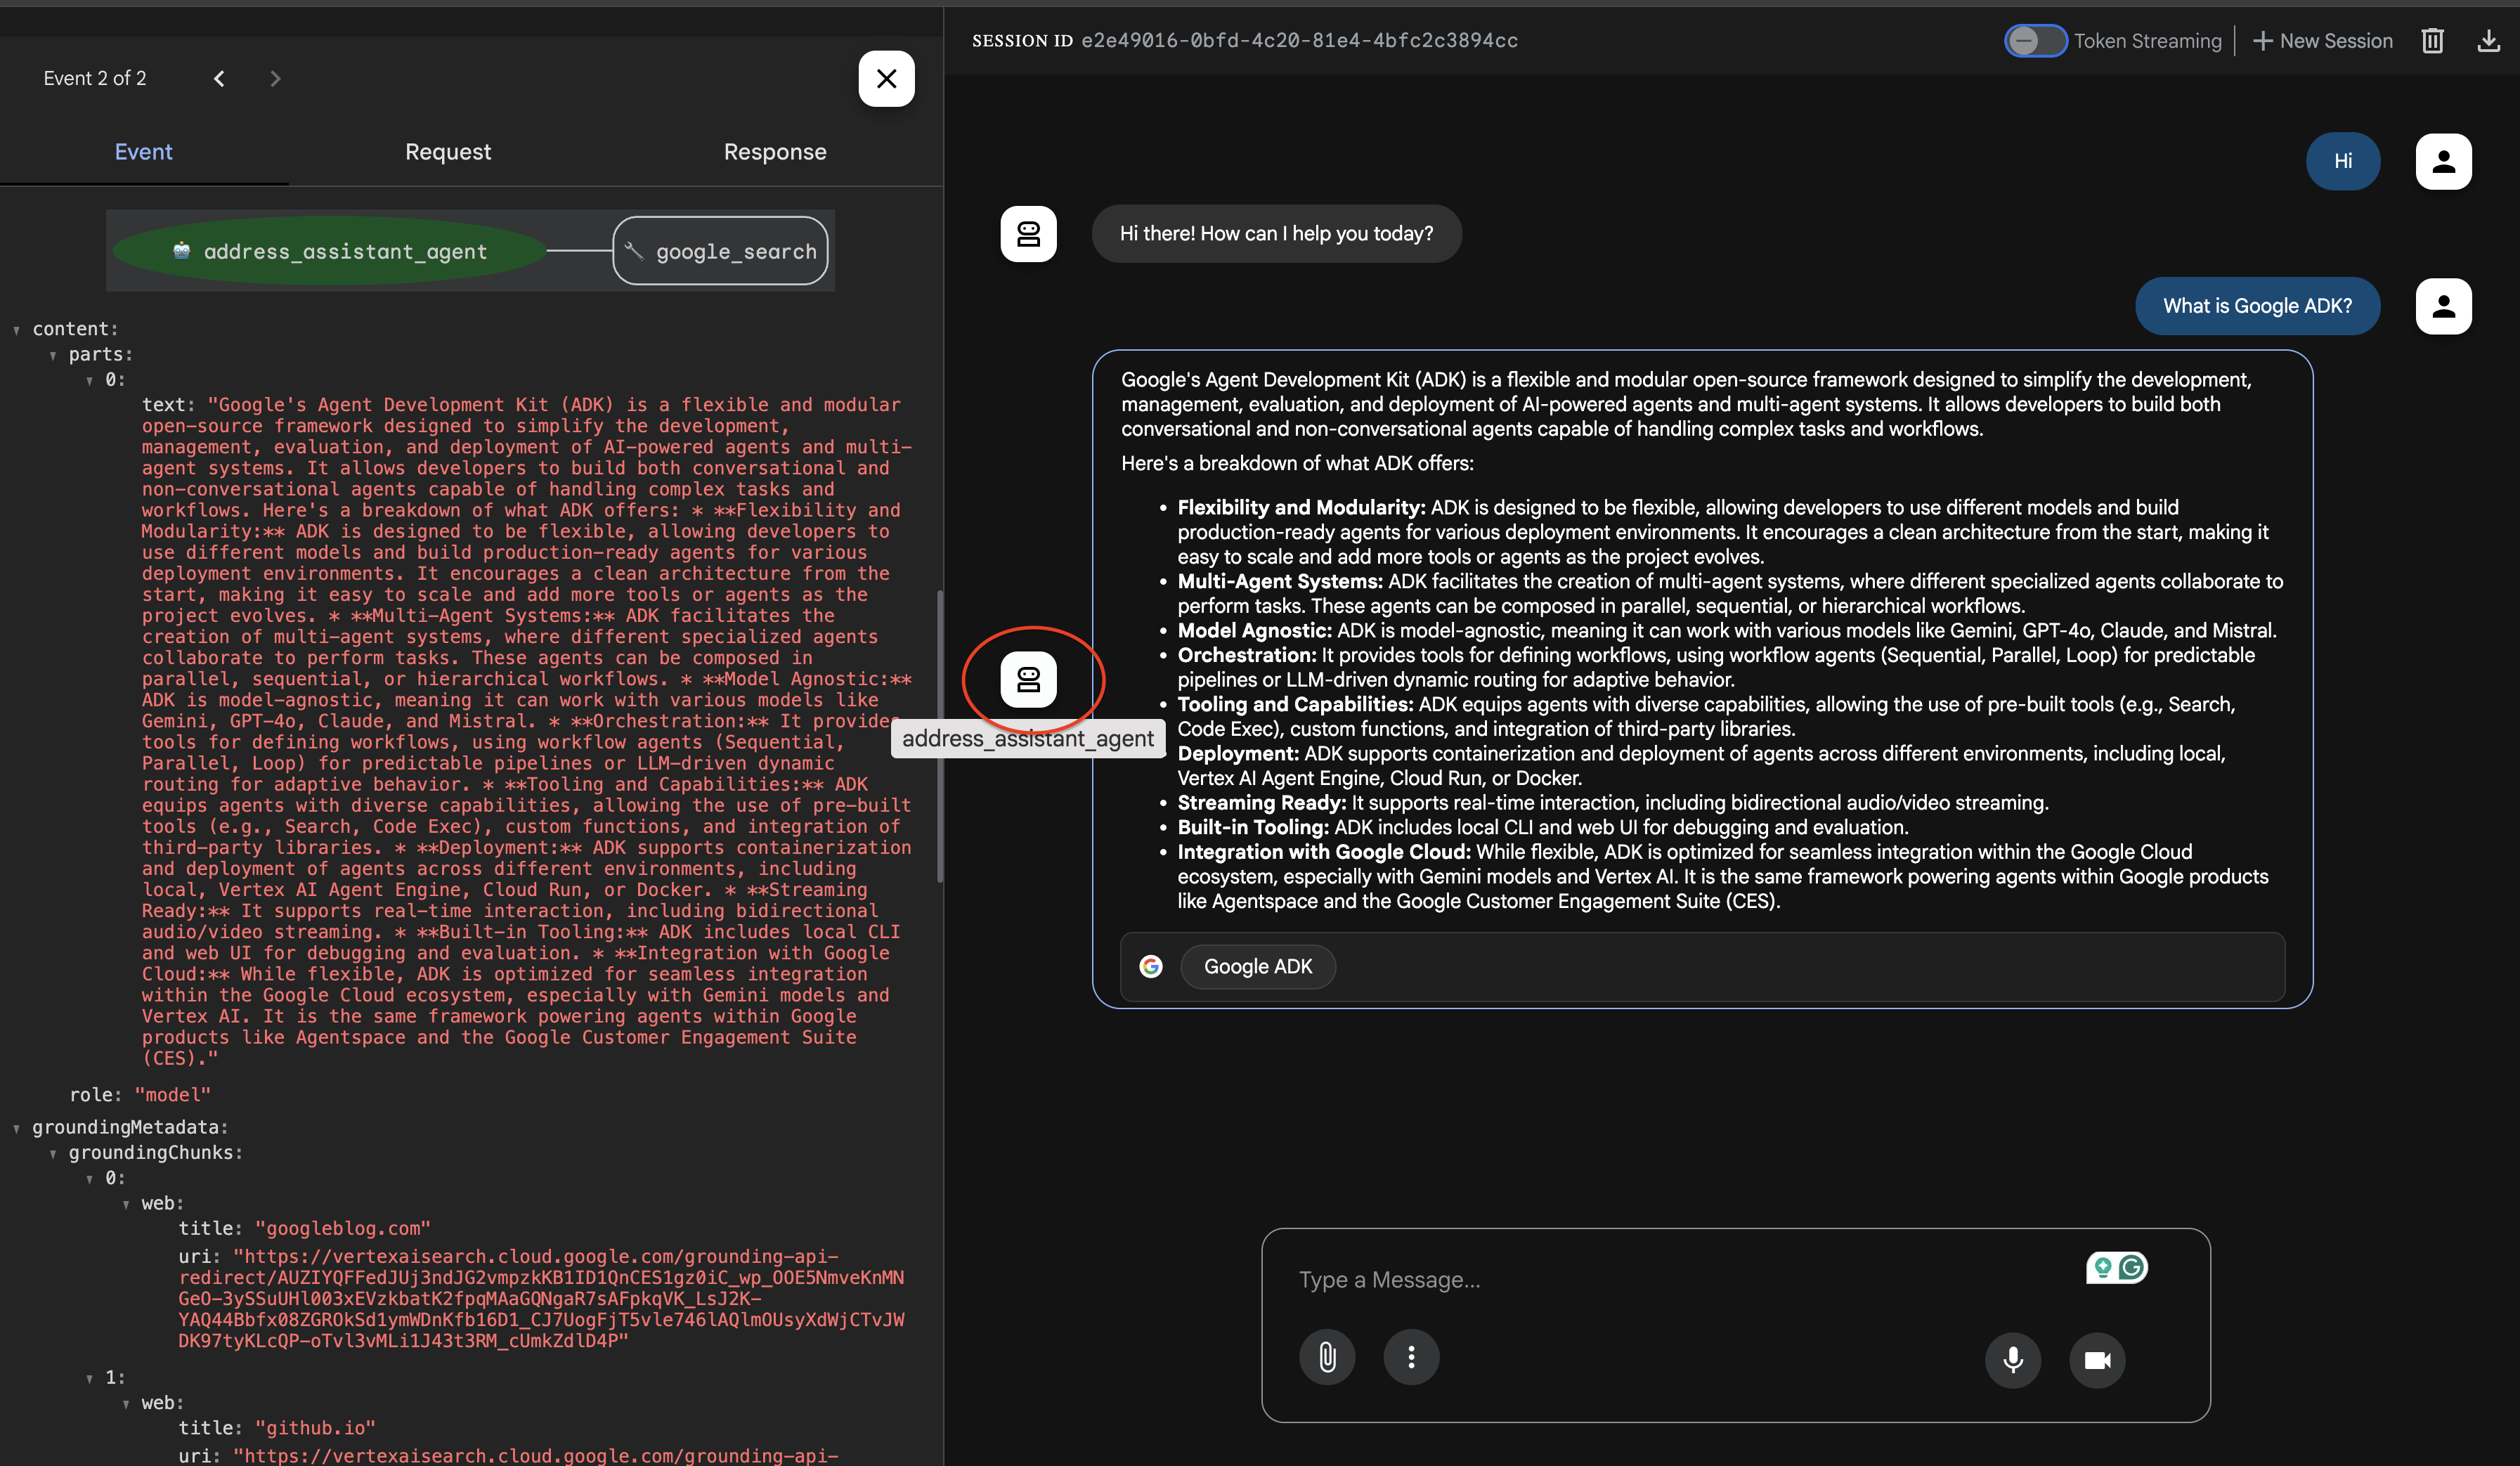
ALso, in the Events tab, you can also hit the Trace button to view detailed logs that show how long each function call took.
Congratulations! You've successfully created and run your first agent using Google's ADK!
Summary
In this article, we explored Google's Agent Development Kit (ADK). We provided a practical guide to building a simple Python-based Google Search Agent, covering setup, and defining the agent's logic, including its model and tools. This hands-on approach aimed to provide a foundational understanding of creating intelligent agents with ADK.
You can find the complete code example on GitHub.
What's Next?
Now that you've got a basic agent running, what else can you explore with ADK?
Add More Tools: Experiment with adding other built-in tools or even creating your own custom function tools.
Different Models: Try using different Gemini models to see how they impact your agent's responses.
Multi-Agent Systems: Dive into creating more complex systems where multiple agents collaborate.